| |
 |
| |
parts needed |
| |
| quantity |
part |
description |
| 1 |
SHVC-1CA6B-01 |
lorom/superFX(gsu-1)/512kb
sram cartridge (stunt
race fx/wildtrax fx for example)
|
| 1 |
27C801-200 |
eprom
8mbit BUY THEM
NOW |
|
| |
|
| |
tools needed |
| |
| soldering
iron |
| needle |
| eprom
programmer |
|
| |
|
| |
software needed |
| |
| starfox
2 rom image |
| snestool |
|
| |
|
| |
section 1 |
| |
modifying
the rom image |
| |
copy
snestool and the rom
into a directory.
next,run snestool and select 'delete
header'
on the rom image(starfox2.smc for
example)
and snestool will remove the first
512bytes(the header)
of the file.(it should be 1048576 bytes
in size now) |
| |
section 2 |
| |
programming
the eprom |
| |
dont have an
eprom writer?
get one here for
$35
you can
also ask around your local electronics
stores,most have an eprom programming
service
and
write your eproms for a small fee.
|
| |
|
| |
|
| |
if
you have access to a suitable eprom
programmer,
write the modified rom image to the
8mbit-eprom
and label it accordingly after you
verified it was properly written.
please refer to your
eprom programmers documentation if you
have problems. |
| |
|
| |
section 3 |
| |
assembling
the cartridge |
| |
|
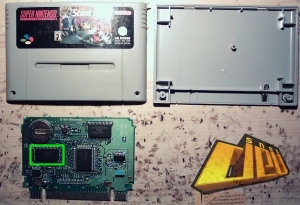
| step1 |
|
| |
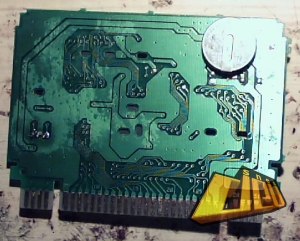
open
the stunt race fx cartridge
with an appropriate screwdriver(if you
dont have one,remove the tip
of a plastic pen,heat the top and press
it onto the screw)
|
| step2 |
|
| |
desolder
the chip marked '8m mask rom'. carefully heat
each pad seperately and lift
the rom
pins one by one with a needle.
|
| step3 |
|
| |
desolder
the battery (avoid heating it up too
much,it could leak) and
solder it onto the opposite side of the
pcb
.(you gonna need the space)
dont
worry,you cant put it in with reversed
polarity and cause a short,
nintendo
had stupid carthackers in mind when
designing the carts :>
|
| step3 |
|
| |
solder
that flat ribbon ide cable you normally
connect your hdd with to the empty pads,it
happens to have the same pinraster.
how
nice.
be
careful not to stress the pads,they break
easily.
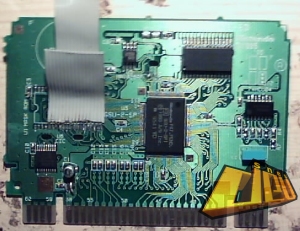
|
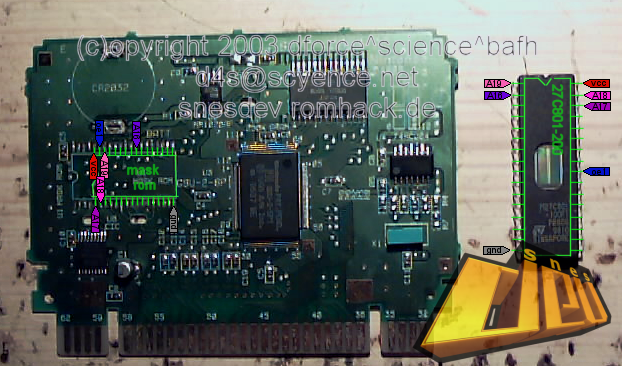
| step4 |
|
| |
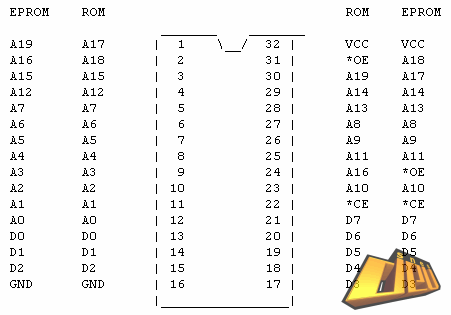
solder
the eprom to the cartridge pcb according
to this diagram: 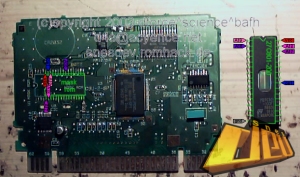
(its pretty self-explaining,connect
labels with the same color and name
together.)
i didnt label the pins on the eprom that
dont differ from the mask rom pinout,but
you have
to connect them to the pcb as well,of
course.
this is the pinout of mask rom compared
to eprom:
|
| step5: |
|
| |
be
sure to isolate everything properly 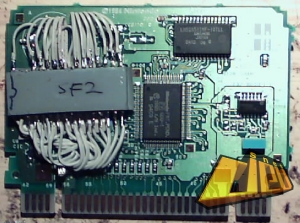
|
| step6: |
|
| |
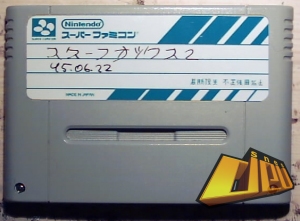
since
this game was never released i prefer a nintendo of
japan prototype label with a more or less
authentic writing on it.
|
| step7: |
|
| |
nuke
andorf. 
|
| |
questions? |