| |
 |
| |
parts needed |
| |
| quantity |
part |
description |
| 1 |
SHVC-1J3M-20 |
hirom/64kb
sram/fastrom snes cartridge (illusion
of time/illusion of gaia for
example)
|
| 4 |
27C801-120 |
eprom
8mbit 8bit BUY THEM
NOW |
| 1 |
74ls139 |
2to4
line adress decoder |
|
| |
|
| |
tools needed |
| |
| soldering
iron |
| desoldering
pump |
| eprom
programmer |
|
| |
|
| |
software needed |
| |
| seiken
densetsu 3 rom image |
| seiken
densetsu 3 translation patch
(german/english) |
| snestool |
|
| |
|
| |
section 1 |
| |
converting
the rom image |
| |
copy
snestool,the sd3 rom and the translation
patch
into a directory.
run snestool,select 'use IPS',select the
translation patch you wanna apply,(german
OR english,not both)
then select the sd3 rom image,snestool
should
report 'ips patch ok'.
pay attention to the filesize of your rom
image,
it should be exact 4194816 bytes.(have a
512byte backup unit header)opening the rom
in a hex editor should look like this:
if you have problems patching the rom,
please refer to the documentation
included
with the patches.
run snestool again,choose 'split',select
the
patched rom image and select 8 mbit
splitsize.
snestool now creates 4 files ending with
.1, .2 etc,
each 1049088 bytes in size.
next,run snestool again and select
'delete header'
on the first of the 4 split-files (sd3.1
for example)
and snestool will remove the first
512bytes(the header)
of all of the 4 files.(they should be
1048576 bytes in size each now)
|
| |
section 2 |
| |
programming
the eproms |
| |
|
| |
dont have an
eprom writer?
get one here for
$35
you can
also ask around your local electronics
stores,most have an eprom programming
service
and
write your eproms for a small fee.
|
| |
|
| |
if
you have access to a suitable eprom
programmer,
write the 4 splitfiles of the sd3 rom
image to the 4 8mbit-eproms
and label them accordingly after you
verified they were properly written.
please refer to your
eprom programmers documentation if you
have problems. |
| |
|
| |
section 3 |
| |
assembling
the cartridge |
| |
|
| step1 |
|
| |
open
the illusion of time cartridge
with an appropriate screwdriver(if you
dont have one,remove the tip
of a plastic pen,heat the top and press
it onto the screw)
|
| step2 |
|
| |
desolder
the big chip marked 'mask rom' 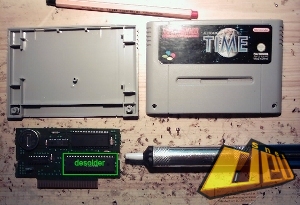
|
| step3 |
|
| |
bend
up pin 24 on each eprom like shown on the
picture,
piggyback the eproms and solder them
together(all corresponding pins except
the pins 24,of course)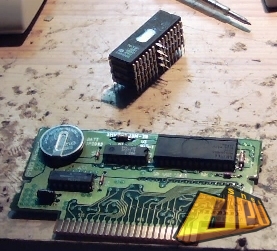
|
| step4 |
|
| |
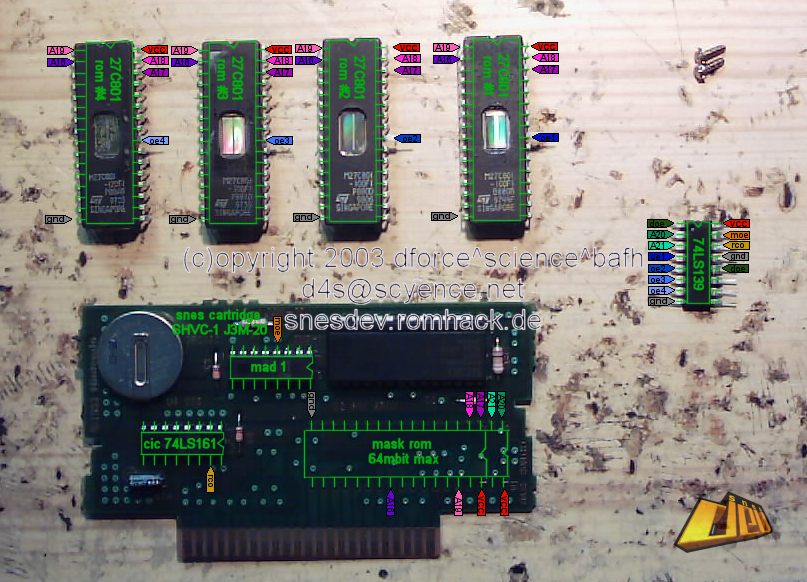
solder
the eprom 'package' to the cartridge pcb
according to this diagram: 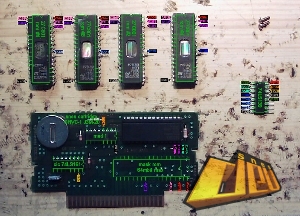
(its pretty self-explaining,connect
labels with the same color and name
together.)
i didnt label the pins on the eprom that
dont differ from the mask rom pinout,but
you have
to connect them to the pcb as well,of
course.
youll
have to place the rom package ontop
of the
cartridge pcb cause it wont clear the
snes cartridge slot otherwise.
watch
the picture at step 5,youll get the idea.
nintendos
ntsc-cic D411 is eqivalent to the
74ls161.
however i wasnt able to find the pal
counterpart so far.
note:
the
above schematics include a protection
against playing the game
on foreign consoles,this pal-cartridge
(with a D413 cic) for example will only
boot on pal systems.
you will not be able to get it to work on
ntsc system,even an import-adapter wont
do. :>
tie pin 1 of the 74ls139 to moe directly
to circumvent it.
this is the pinout of mask rom compared
to eprom:
i use flat IDE ribbon cable to connect
all pins that are the same
on both eprom and maskrom,this is faster
and more reliable.
|
| step5: |
|
| |
remove
the tabs inside the cartridge housing
marked 'remove' 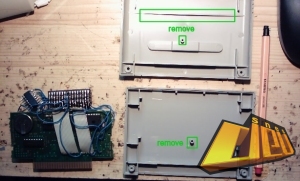
|
| step6: |
|
| |
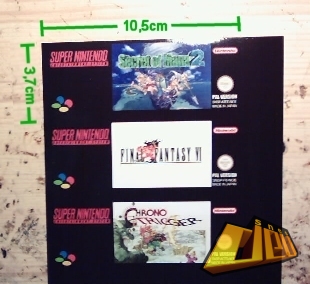
ask
your local photo store to develop this
label onto photo paper
at the lab,most stores have a service
like this.
it looks much better than printing with a
printer on photo paper.
the label needs to be 10,5cm x 3,7cm in
size.
|
| step7: |
|
| |
remove
the illusion of time label
and glue the secret of mana 2 label onto
the cartridge.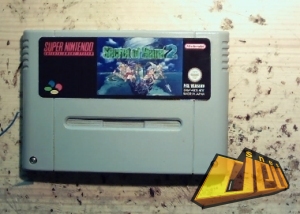
|
| step8: |
|
| |
have
fun. 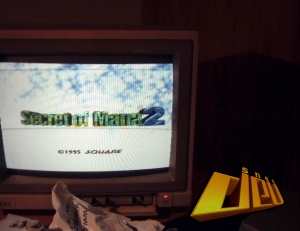
|
| |
questions? |